
Can Embroidery Be Removed?
Summary: Yes, embroidery can be successfully removed from most fabrics without permanent damage. We'll walk you through the safest methods, essential tools, potential risks like fabric shadows, and expert tips for the best results when removing unwanted embroidery from clothing and accessories.
Have you ever looked at a piece of clothing with embroidery and thought, "I love this jacket, but I really wish that logo wasn't there"? Or maybe you're dealing with a misspelled name on a custom piece that needs fixing? Don't worry, we've been there! At Artemis, we've seen our fair share of embroidery mishaps and removal requests over the years, and we're here to tell you that yes, embroidery can absolutely be removed.
The short answer is encouraging: most embroidery can be taken out without ruining your garment. But like most things worth doing, it requires patience, the right tools, and a gentle touch. Let's dive into everything you need to know about removing embroidery safely and effectively.
Why You Might Need to Remove Embroidery
We've worked with countless customers who needed embroidery removal for various reasons. Sometimes it's a spelling error (happens to the best of us!), sometimes it's outdated company logos, or maybe you just want to refresh an old favorite piece. Whatever your reason, you're not alone in wanting a clean slate.
The Good News: Most Embroidery Can Be Removed
Here's what we've learned from years in the business: embroidery removal is definitely possible on most fabrics. Machine embroidery, hand-stitched designs, even those stubborn patches can usually come out with the right approach. The key is understanding that this isn't a race. Rushing through the process is the fastest way to damage your fabric.
Our Step-by-Step Removal Process
Start from the Back
We always recommend flipping your garment inside out first. This gives you access to the back of the embroidery where you can see all the stitching and backing material clearly. Working from the back minimizes visible damage to the front of your garment and gives you better control over the removal process.
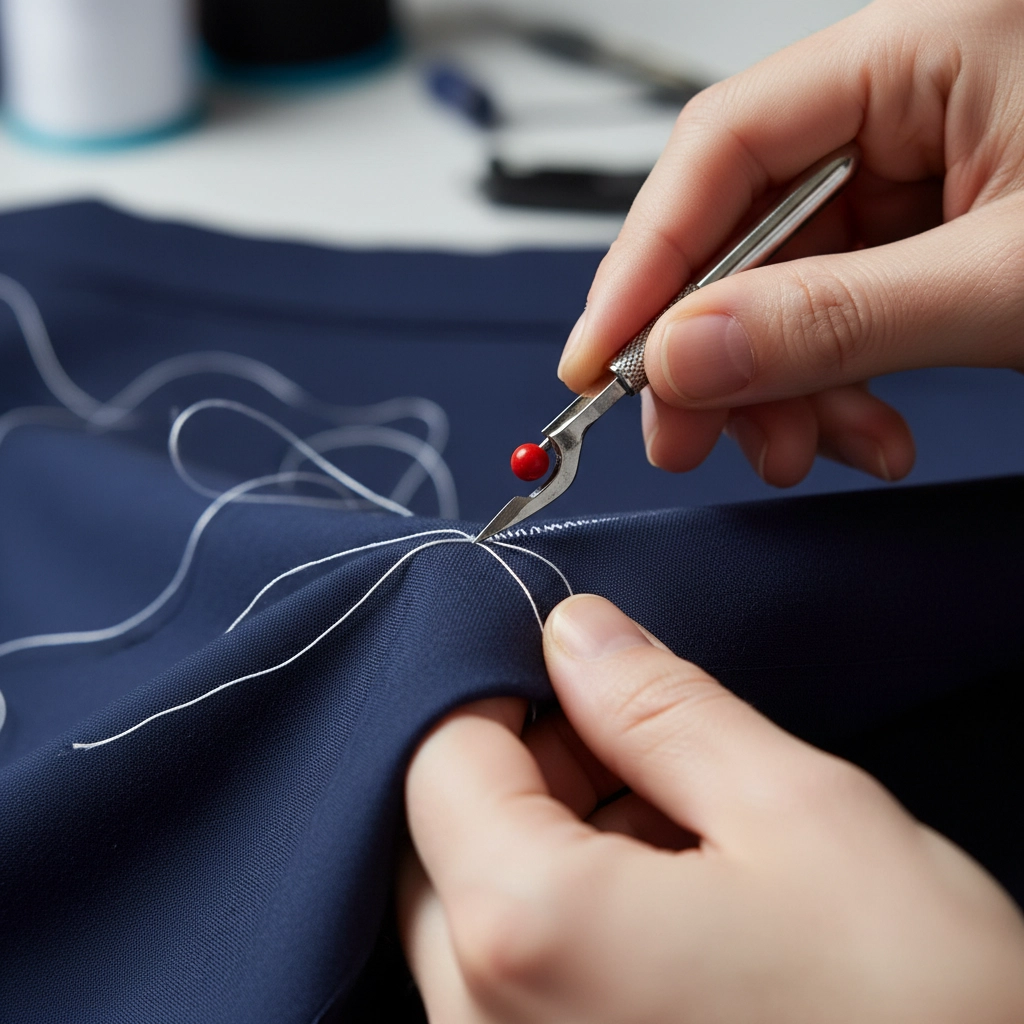
The Seam Ripper Method
Your best friend in this process is a good seam ripper. We use this tool to carefully cut through individual stitches, working methodically rather than trying to rip everything out at once. Here's our technique: insert the sharp tip under a stitch and make small, controlled cuts. For dense embroidery areas, we cut every third or fourth stitch to avoid stressing the fabric.
After cutting several stitches from the back, flip the garment right-side out and use tweezers to gently pull out the loosened threads. This back-and-forth process might seem tedious, but trust us: it's worth it to preserve your fabric.
Essential Tools We Recommend
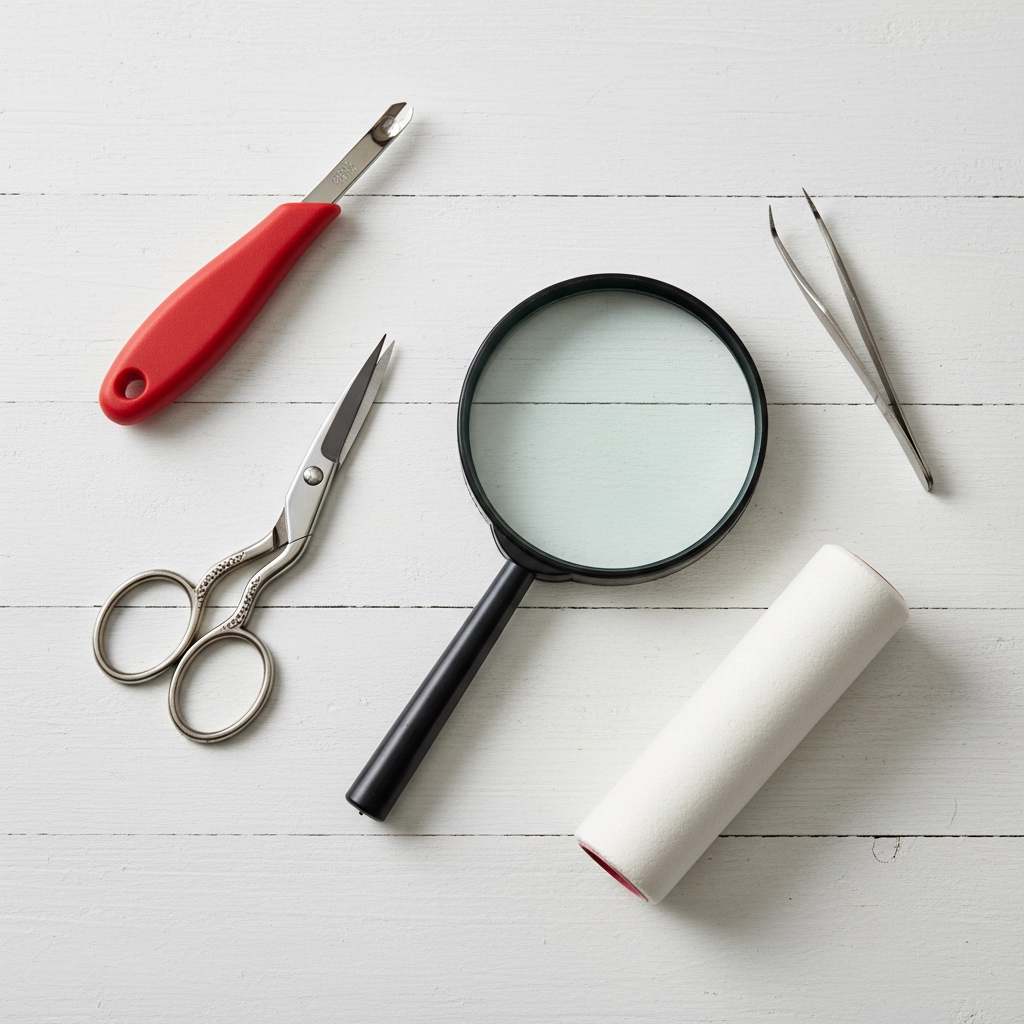
Over the years, we've found that having the right tools makes all the difference:
- Seam ripper: Your primary weapon against unwanted stitches
- Curved embroidery scissors: Perfect for getting into tight spaces
- Angled tweezers: Essential for gripping and pulling out loose threads
- Good lighting: We can't stress this enough: proper lighting prevents mistakes
- Magnifying glass: Helpful for detailed work, especially on intricate designs
- Lint roller or masking tape: Great for cleanup afterward
For those tackling larger, dense machine embroidery projects, we've seen excellent results with specialized electric removal tools. These can cut your removal time significantly, though they do require a bit more investment.
Potential Risks and What to Expect
Let's be honest about the potential downsides: we believe in transparency at Artemis. Even with perfect technique, there are some risks to consider:
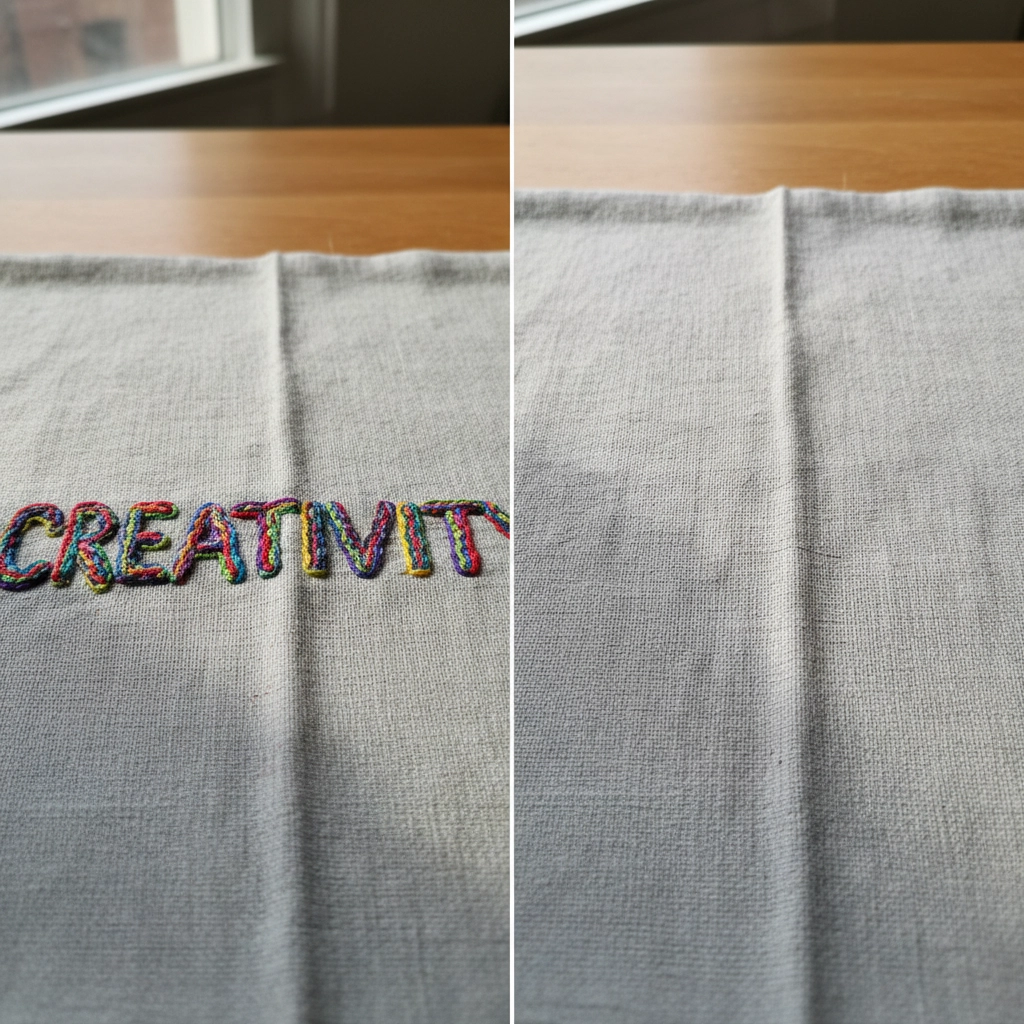
Fabric Shadows
Sometimes, especially with dark thread on light fabric, you might notice a slight shadow or impression where the embroidery used to be. This happens because the original stitching compressed the fabric fibers. While not always avoidable, gentle steaming can often minimize these marks.
Tiny Holes
Dense embroidery can leave small pin holes in the fabric. Most of these close up on their own, especially after washing, but some delicate fabrics might retain visible holes.
Fabric Stretching
If you pull too hard or work too aggressively, you risk stretching or distorting the fabric around the embroidery area.
Our Pro Tips for Success
Take Your Time
We can't emphasize this enough: patience is your greatest asset. Set aside a couple of hours and work in good light. Rushing leads to mistakes and potentially damaged garments.
Protect Delicate Fabrics
For delicate materials, we sometimes place painter's tape on the right side of the fabric as a protective barrier while working from the back.
Work in Small Sections
Rather than attacking the entire design at once, focus on small areas. This gives you better control and reduces the risk of accidental cuts.
Clean as You Go
Use a lint roller frequently during the process to remove loose threads and keep your work area clear.
When to Call in the Professionals
Sometimes the smartest move is knowing when to seek help. We recommend professional removal for:
- Extremely valuable or sentimental garments
- Very delicate fabrics like silk or vintage materials
- Large, complex designs covering significant areas
- Items where you absolutely cannot risk any damage
After Removal: Cleanup and Care
Once you've successfully removed the embroidery, there are a few finishing touches we recommend:
Give the garment a gentle wash to remove any loose fibers and help the fabric relax back to its original state. A fabric shaver can help smooth out any fuzziness left behind, and steaming can help eliminate those fabric shadows we mentioned earlier.
Making the Decision
Before you start cutting, ask yourself: is the embroidery removal worth the risk? Sometimes the time and potential for damage outweigh the benefits, especially if the embroidery is well-integrated into the garment's design.
At Artemis, we've seen successful removals on everything from corporate polo shirts to vintage jackets, and we've also seen projects that were better left alone. Trust your instincts and don't be afraid to start small with a less valuable item to practice your technique.
Remember, embroidery removal is absolutely possible with patience and the right approach. Take your time, use proper tools, and don't hesitate to seek professional help when needed. Your favorite garment might just get a second life!